Go to http://ik.duduf.com and download the IK tools. Install the files in the scripts folder of After Effects: (win = c:\Program Files\Adobe\Adobe After Effects\Support Files\Scripts”, mac : “Applications/Adobe After Effects/Scripts/").
So I set that up and began working on my Flash file to see if I can export my characters body parts and the head to be ready for flash.
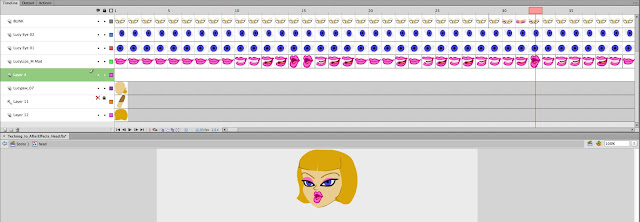
I will first make a copy of my flash file. With the first copy I am going to delete everything except the head. I will keep the 378 Frames that I used to lip sync to a high quality audio file I received.
 |
| That's a lot of chatterin'! |
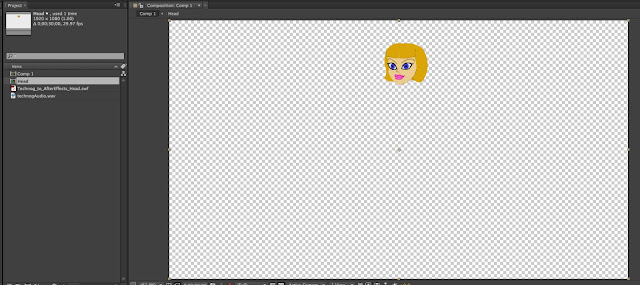
I exported the head as a SWF file. Importing that into After Effects is no big issue. Once I put it in a Composition, I imported the audio file to the comp and named it "Head". I then proceeded to create a new comp for the body.
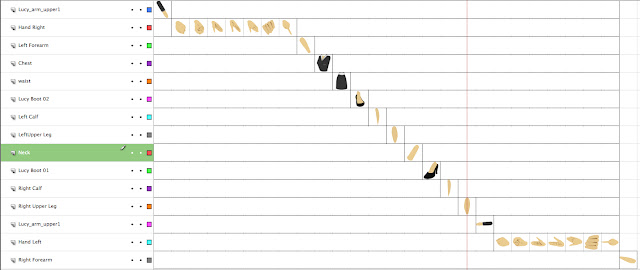
Now The SWF works out great in this instance because it is just one symbol I want to animate. If I wanted to export all the body parts into separate layers into AE, I'd need to export an individual SWF for each body part for the IK stuff. So I separated each body part, while making frames for each hand position. Be sure to flip, rotate and position the items (in this case, the hands) in the correct position. It will be a pain in the gluteus if you don't.
 |
| This is how it looks in Preview mode. |
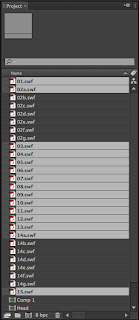
So I exported each individual frame as an individual SWF. Tedious, but effective. I used a numerical naming sequence, using an alphanumeric extension to remind me what needs to be in a separate composition:
01.swf, 02a.swf, 02b.swf, etc etc.
Now go to After Effects and import the Head SWF. The symbol should pop up in around the same area that you're used to. Don't worry about the Anchor Point yet.
 |
| Floating Heads are cool. |
The next thing will be to import the body parts. Just import them all and they should populate your project bin with no issues.
 |
| BAM! |
The next thing is going to be to select all those ABC files and Pre-Comp them (Shift+Control+C). Open the new Left Hand Comp and position the frame so that each hand is shown for only one frame. A quick way to do it is to right click on a blank part of the composition window (where 02a.swf and the rest are) and choose composition settings. Set the length of the comp to around 10 frames or so. Select all the layers and shorten their length to one frame (you drag one you'll shorten them all.) Then right click on the frames and choose Keyframe Assistant > Sequence Layers and hit OK. BAM! You're set. You may want to extend the final frame a few more than 1 frame, in case you aren't that accurate with your choice of frame, you have some room for error when it comes to the keyframe.
 |
| That make more sense? Didn't think so. |
Ok, let's assume you have a Comp on your timeline named Left Hand, and it has the frames set up like above. Go to the first frame of the Left Hand and use the keyboard shortcut Alt+Control+T to enable Time Remapping.
Now go to the main timeline and create a Null Object. name it Left Hand Slider. When it is chosen, go to the Menu and choose Effect > Expression Controls > Slider Control.
You should now have something that looks like this.
Now HERE is the tricky part: Alt+Click on the stopwatch next to the Time Remap Effect to turn on expressions. The timecode should turn reddish.
 |
| Pink? |
Now, right below the timecode you will see an equal sign, a graph, a swirl, and a "play" button. This next step will have you clicking and dragging the swirl, which is called the Pick Whip, to the Slider Value of the Slider.
If it worked, you should have some weird stuff happening at the expression text box.
 |
| What is that, greek? |
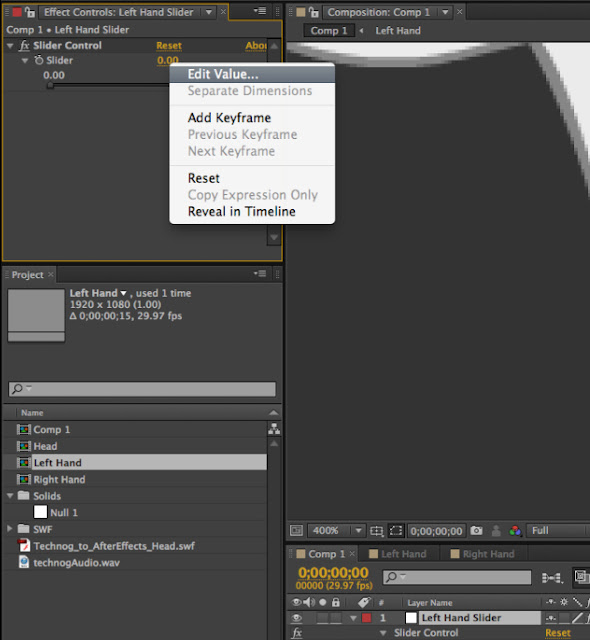
Don't worry about that right now. Ok, so in the Left Hand Comp, I only made it 15 frames long. So we are going to go to the Left hand slider and right click on the slider value to Edit the value.
 |
| Right on the "zeroes"! |
Once you choose Edit value, just double click the 100 and type in 15, or however long you made your hand comp.
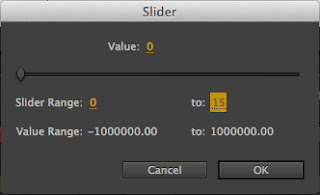 |
| I chose 15 frames, so.... yeah. |
Now that the slider has the proper value, you need to write some code to make the slider accurate. That is surprisingly easy. All you need to do is divide it by the frame rate of the composition (29.97 is usual, some people like 30, 24, etc.) this will make the slider work.
 |
| Before... |
 |
| .... and then--MAGIC! |
Then I Pick Whip the Left Hand Comp to the Left Hand Slider. I then press the letter R in order to bring up the Rotation settings to make sure the Slider has control of that comp. If it does, I add a keyframe for rotation in the first frame. That way, after you lock the left hand layer, you can hit the letter U, and have the things show up that have a keyframe.
 |
| Nothing to it! |
This should work pretty good for faces... maybe. But it works GREAT for hands and other poses.
Next, I'll try to use the KuIK Inverse Kinematics plug-in on this character.
 |
| She'll soon be dancing in the streets. |


